|
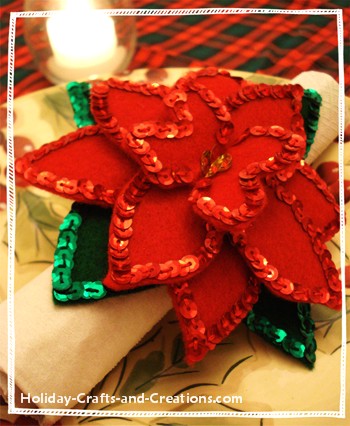
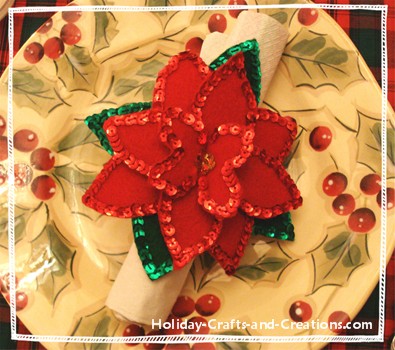
Poinsettia Christmas Napkin RingsThese Christmas napkin rings are fun and easy to make, and will bring elegance and charm to your dinner table. They are made out of felt, so they are inexpensive, and if you are using this as a project for kids, scroll down to the more simple design using puffy paint rather than sequins as shown here. Either version is a great holiday activity and will add sparkle to your table!
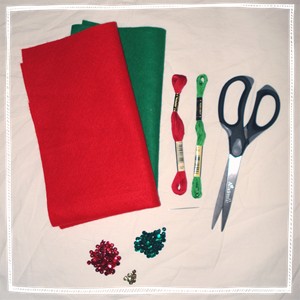
What You Will Need: Red & green felt Red, green & gold sequins Red & green embroidery thread Sewing needle Scissors Optional: You can apply the sequins with a hot glue gun instead of sewing them. This is much faster, but the sequins may pop off and not look as nice.
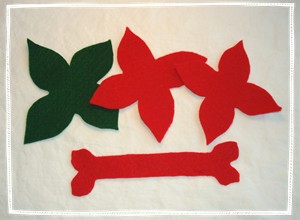
Step 1: You will first need to cut out three petal shaped pieces of felt. You can do this by printing out the provided template (.pdf file) and tracing it onto the felt. Of the three patterns, there should be one small, one medium, and one large. The large piece should be cut out of green felt, while the other two should be red. You next need to cut out a long strip that looks like a stretched out bone. This will be about 6 inches long, and is also provided on the template. This too is done in red felt.
Step 2: Now that you have all of the pieces cut out, it is time to sew on a border of sequins onto each piece. As mentioned above, you can choose to glue them on with hot glue, but they are likely to pop off and excess glue can tend to get everywhere. However, it will make the project go faster. For learning how to sew on a border of sequins, Please see our "Helpful Hints: Sewing Sequins" page. Of course you will want to put red sequins on the red pieces of felt and green on the green piece. Sew sequins onto all three petal pieces first, and wait on the bone shaped piece. 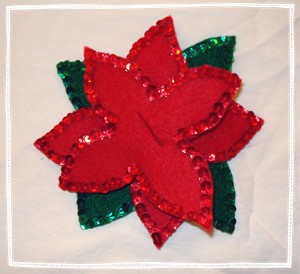
Step 3: Before adding any sequins to the bone shaped piece, you will want to assemble the Christmas napkin ring. To do this, first place the petal shaped pieces on top of each other, with the smallest on top, medium in the middle, and largest on the bottom. Alternate the angles of each piece as shown in the adjacent picture. You then should carefully fold them all in half and make a small cut in the center. If it is too thick to cut all the way through the three pieces all at once, cut them each separately. However, you will want to make sure that the slits line up so each petal is in the direction you want them. Then take the bone shaped piece, and push each end through the cuts you just made. You should now have what looks like a poinsettia on the top and a loop on the bottom. Step 4: All that is left to do now is to add sequins to the center-most petals (the ends of the "bone"). Apply a border of red sequins just to the petal part, not the whole napkin holder loop underneath. Each side of the center petals will have to be sewn separately from each other. Before you cut the thread and tie it off on each side, add three or four gold sequins to the center of the petal. Once both sides are complete, you are now done. Make a few more, and you will have a lovely set of Christmas napkin rings!
Puffy Paint VariationTo make this project a little easier and faster, you can choose to apply a border of puffy paint instead of sequins. This will still give the Christmas napkin rings some sparkle, but can be done in less time. This is a good idea if you are doing this project with small children. 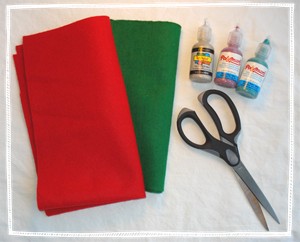
What You Will Need: Red, green & gold glittery puffy paint. Red & green felt Scissors Step 1: This step is the same as "Step 1" above. Step 2: Outline each of the petal pieces with puffy paint. However, on the bone shaped piece, only outline the two ends (not the long straight portion). Do this before you assemble the napkin holder. Allow the paint to dry about 2 hours before you work with the pieces again. They will take about a day to fully set, but 2 hours is enough time so they can be touched without smudging. 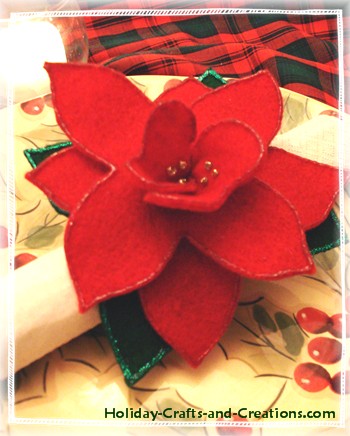
Step 3: Do this step as described above, but skip the first sentence about the sequins. Finally, once it is assembled, you can add several dots of the gold puffy paint to the center petals. It is best to do this last so you can see where they will be most visible. You are now finished with your first of many Christmas napkin rings!
Return to Christmas Crafts from Poinsettia Christmas Napkin Rings
Liz O. Says: Violeta Says: |


