
Easter Table Setting Ideas:
Easter Egg Candy Cups
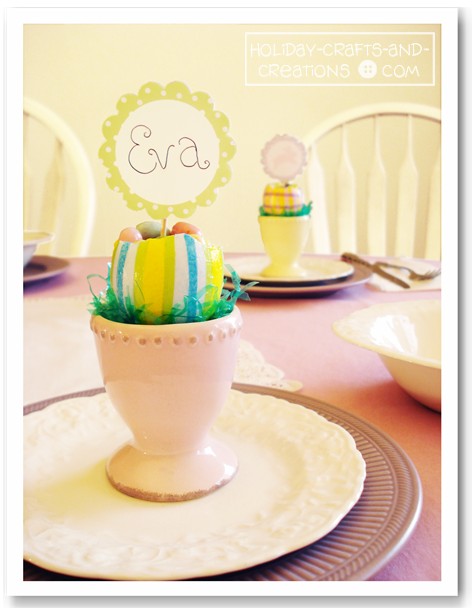
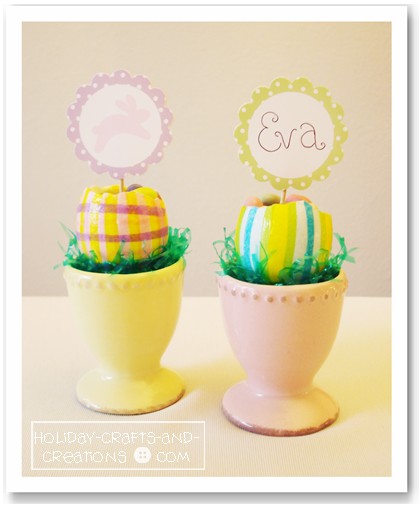
Do you need some Easter table setting ideas? Then try our Easter egg candy cups! These candy cups make really cute Easter place cards, or they could also be used as an Easter centerpiece. This is a very easy idea for decorating eggs, using just Mod Podge and pastel colored tissue paper.
And once your Easter eggs are decorated, you can fill them with Easter jelly beans and stick a name tag in the center. We suggest using a cupcake topper style name tag, and we have provided the template for them. So if you’ve been looking for some Easter egg ideas or some easy Easter crafts for kids, then try this fun and inexpensive project.

Materials For Easter Table Setting Ideas:
Easter Egg Candy Cups
What You Will Need:
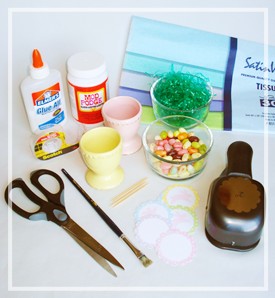
- Eggs
- Colored tissue paper
- Mod Podge
- Paintbrush
- Scissors
- Toothpicks
- Cupcake Topper Template
- Easter egg holder
- Artificial Easter grass
- Double-sided tape or glue
- Easter jelly beans or other Easter Candy
- Optional: 2" scalloped paper punch
Instructions For Easter Table Setting Ideas:
Easter Egg Candy Cups
Step 1:
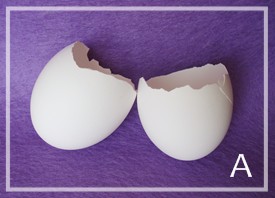
Begin by carefully cracking your raw eggs in half. Try to crack each egg a little bit above half. This way your eggs will be deeper to hold more jelly beans! See photo A.
To sterilize the eggshells so they are ready to hold candy, gently boil the shells for 2 – 3 minutes and then set them on a napkin to dry. Now your eggshells are ready to be decorated.
Step 2:
Cut strips of different colored tissue paper. You could cut some at varying widths to create your own pattern and design. You could even cut different shapes or circles if you would like a design other than stripes or plaid.
Step 3:
Now begin painting on a layer of Mod Podge on one section of the shell. Don't paint the whole shell at first or the Mod Podge will get too sticky by the time you get to it all.
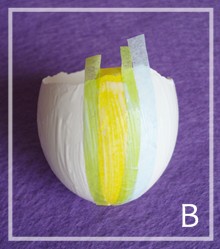
Next, lay your strips of tissue on the shell. It is okay if the tissue hangs over the edge of the shell, as this can be carefully trimmed or torn off later. Once some of your tissue is in place, paint another coat of Mod Podge over the tissue to help seal it in place. See photo B.
Continue putting on a little tissue at a time until the entire egg is covered. Be sure the tissue is sealed on with a final coat of Mod Podge. Then let the egg dry completely. Place the egg upside-down on its cracked edge while it is drying so the sides don't stick to anything. Once the egg is dry you can trim or tear off any extra tissue overhanging the edge of the egg.
Step 4:
Now place some artificial Easter grass in your Easter egg holder. Then place the eggshell in the holder and fill it with Easter jelly beans or other Easter candy.
Step 5:
If you will be using these as Easter place cards, then print out our Cupcake Topper Template to use as the name tags. If you have a 2" scallop paper punch, then punch out each design. Otherwise you can simply cut out each design as a circle, leaving an edge of the polka dots.
Write your guests name on one of the blank tags, and tape this to the end of a toothpick. Then cover the back with one of the bunny tags. Now stick one of these tags in each of your Easter egg candy cups and set them around your dinner table for your guests!
For more Easter table setting ideas, click the link below to see what other fun and easy craft ideas for Easter we have to offer!
Return to Easter Crafts from Easter Table Setting Ideas: Easter Egg Candy Cups