Easy Sewing Projects: Shamrock Barrette
This whimsical shamrock barrette is one of our easy sewing projects for St. Patrick’s Day. These darling hair clips are quite simple and fun to make and very inexpensive too! And if you or your kids need something green to wear, these barrettes would be the perfect green accessory. So check out this easy sewing tutorial and learn how to make these cute kids hair accessories. Or you could also use this shamrock template to make a brooch!
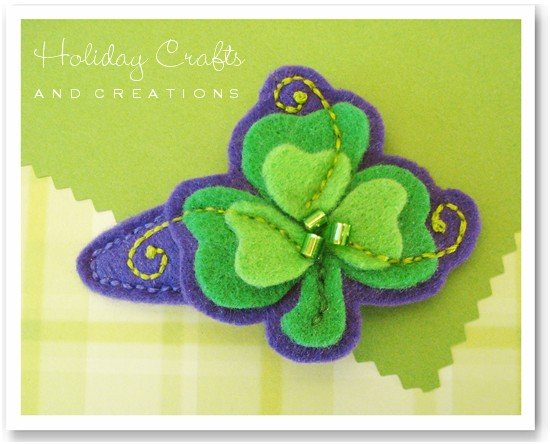
Materials for Easy Sewing Projects:
Shamrock Barrette
- Hair clips (metal snap clips)
- Felt: 2 shades of green, dark purple
- Embroidery thread: 2 shades of green, dark purple
- Needle
- Scissors
- 3 Green beads
- Shamrock template
Instructions for Easy Sewing Projects:
Shamrock Barrette

Print and cut out the shamrock barrette template. Trace and cut out the felt pieces. We used medium green for the shamrock, light green for the inner leaves and dark purple for the background and the barrette cover.

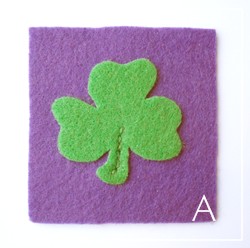
Using the running stitch in matching thread, sew the shamrock stem onto the background square. See photo A. Since the purple square will be cut out later (to border the shamrock), we would suggest starting in the center of the shamrock and work your way to the stem end and then back again to the center. When you are done, it will look like the backstitch. But be sure to use the running stitch so you can work your way back to the center. That way your knot will be in the center of the shamrock and not on the outer edge of the barrette. See photo G to see that all the knots are hidden in the center, under the clip cover.

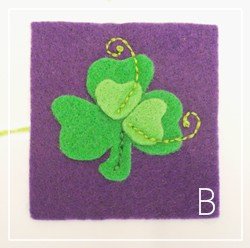
Again using the running stitch (this time in light green thread) sew on the light green center leaves. And again, start in the center of the shamrock and work your way to the end of the swirl. At the end of the swirl, either use a French knot (like we did) or you could sew on a seed bead. Then work your way back to the center of the shamrock.
Note: Only do two of the leaves/swirls. This is because the leaf that's on the side of the clip will be stitched on later. Those stitches are part of what anchors the shamrock to the clip cover. See photo B.
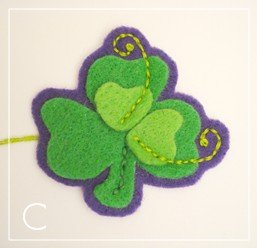

Now cut a border around the shamrock and swirls. See photo C. The border doesn't have to be exact, but try for about a 1/8" border of purple.

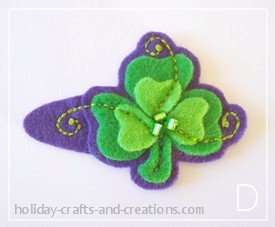
Now attach the shamrock to the clip top cover by sewing the last light green center leaf. This time you can sew the swirl out onto the clip top cover. We made this swirl a little larger than the other two.
Sew on three green beads in the center of the shamrock. See photo D.

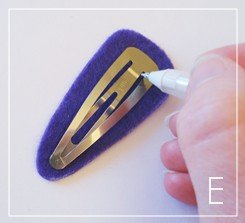
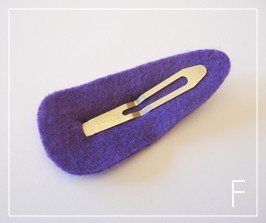
Center your hair clip on the bottom cover and mark the felt with two dots on each side of the inner clip as seen in photo E. Cut a slit in the felt between these two dots and slide the clip through that slit. See photo F.

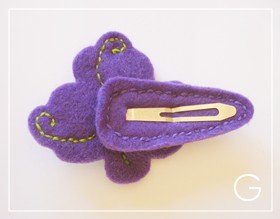
Sew the front cover to the back cover in matching purple thread. We wanted it to have a solid stitched line so we used the running stitch and went around twice. That way the stitching on the bottom cover of the barrette looks just like the front. See photo G. If you use the backstitch to achieve the solid line look, the bottom cover will have thicker, bulkier stitches.
Your shamrock barrette is all finished! Want to do more sewing? Check out the matching felt bracelet, which would be so cute with this barrette!
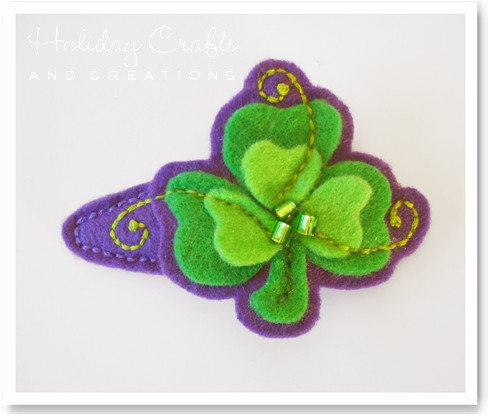
We hope you've enjoyed this sewing tutorial on how to make shamrock hair accessories for kids. And for more easy sewing projects, click the link below.
Return to St. Patrick's Day Crafts from
Easy Sewing Projects: Shamrock Barrette

Laura Says:
OMG!!! This is awesome!!! I will totally try this on Saint Patrick's Day. Both the bracelet and the barretteJan Says:
So cute! Think I will make a pin with it.Gladys Says:
Both my granddaughters loves these they are so proud to wear them to school to show them off to their friends Thanks so much for sharing!Staci Says:
I love these! I'm including them in my Friday Favorites this week at http://craftystaci.com!Amber Says:
I love it! Thank you for sharing.Donna Says:
Beautiful idea! ThanksSimony Says:
Thanks!Silvia Says:
Is very beautifull and pretty, thanks...


