
Easy Sewing Projects: Beaded Flower Banner
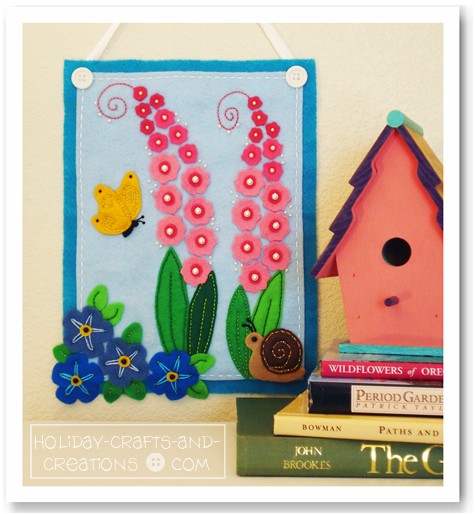
Looking for some easy sewing projects to do this summer? Then our beaded flower banner may be just the summer sewing project for you! It's an adorable mini banner featuring lots of beadwork and easy-to-do embroidery stitches. So if you are looking for some beginner sewing patterns, then give this beaded flower banner a try! It would also make a fun project to teach your kids how to sew by hand. And besides, doing some kids sewing projects can be a great summer-time activity.

Materials for Easy Sewing Projects: Beaded Flower Banner
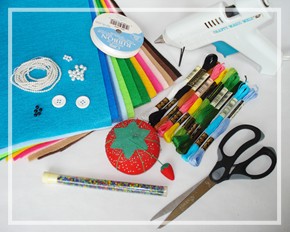
- Felt: full sheet (9" x 12") of turquoise and light blue
- Other felt: 2 shades blue, 3 shades green, 3 shades pink, yellow, tan, brown, black
- Embroidery thread: white, pink, black, yellow, light brown, 3 shades green, 2 shades blue
- White ribbon: 15" long and 3/8" – 1/2" wide
- 2 White buttons: 3/4" wide
- 14 Pearl beads: 1/4" wide
- 7 Pearl beads: 3/16" wide
- 45 Pearl beads: 1/8" wide
- 5 Black round beads: 3/16" wide
- 7 Black seed beads
- 20 Blue seed beads
- 45 Yellow or gold seed beads
- 35 Light brown or gold seed beads
- Sewing needle
- Thin seed bead needle
- Scissors
- Hot glue gun
- Thin cardboard
Instructions for Easy Sewing Projects:
Beaded Flower Banner

Cut the sheet of light blue felt so it leaves a 1/2" border on all sides of the turquoise sheet of felt. Stitch the light blue felt onto the turquoise felt using the running stitch in white thread.

Print and cut out the Flower Banner template.

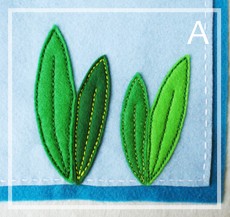
Start with the 4 large leaves. We used 3 shades of green felt. Stitch these leaves into place using the backstitch. We also used 3 shades of embroidery thread. Be sure to place these large leaves off to the right side of the banner so there will still be room for a butterfly after the pink flowers have been sewn on. See photo A.

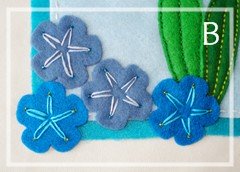
Cut the 4 large flowers out of 2 different shades of blue felt. Stitch these flowers into place using the lazy daisy stitch in 2 different shades of blue thread. The blue seed beads can be sewn on during the lazy daisy stitch or they can be sewn on after the stitch is complete. See photo B. Then sew on the yellow felt centers to each flower. These can be sewn on with the black beads, all in one step. See photo C.
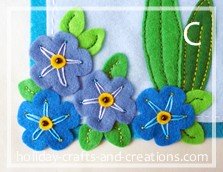

Cut 8 small leaves out of two or more shades of green felt. Stitch these leaves into place using the backstitch. Also use a few different shades of green thread for added interest. See photo C.

Now cut the snail's body out of tan felt and its shell out of brown felt. Stitch both pieces into place by stitching along the shell only. Using the backstitch in light brown thread, stitch around the entire edge of the shell and then stitch a swirl in the center of the shell. No stitching is needed along the snail's body because it's being anchored by the stitches on the shell. Now sew on a black bead for the snail's eye. To make the snail's antennas, use the backstitch in black thread. Then sew on a black seed bead to the end of each antenna.
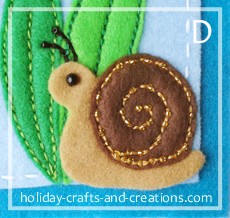
As a finishing touch to the snail, sew on a few light brown or gold seed beads along the swirl on its shell. See photo D.

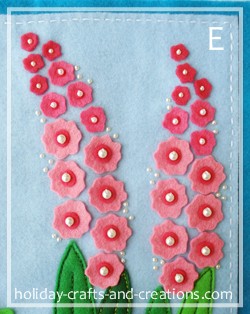
Cut out 14 of the flower pattern shape marked "A" on the template, in your lightest pink felt. Then cut out 14 of the circles marked "a" on the template in the darkest pink felt. Then cut 7 of the flower pattern shape marked "B" on the template in the medium shade pink, and cut 7 of the circles marked "b" on the template in the darkest pink. Now cut 8 of the flower pattern shape marked "C" on the template, in your darkest pink felt. Now simply attach each pink flower and its dark pink center (smallest flowers have no centers) with a pearl bead in the center. Sewing on the pink flowers will go pretty fast since each flower and pearl bead center can be attached with one stitch.
Once the pink flowers are in place, you can embellish them with some of your tiny pearls, randomly sewn around the flowers. See photo E.
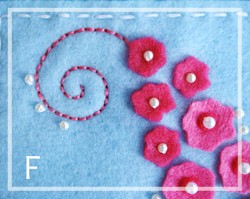
Now to add a finishing touch to your pink flowers, you could stitch a swirly vine off the tip of each stalk. Using the backstitch, stitch the swirl design with dark pink thread. Then add a few more small pearl beads if you would like. See photo F.

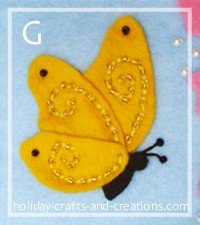
Cut the butterfly's wings out of yellow felt and its body out of black felt. Anchor each wing in place with a black seed bead at the tip of each wing. Place the butterfly's body underneath the wings so that when you stitch down the wings, it will also anchor the body into place. No stitching is needed along the butterfly's body because it will be held in place with the stitches on the wings. Now using the backstitch in light yellow thread, stitch a swirl design into each wing, making sure that you are also anchoring the body with your stitches.
To make the butterfly's antennas, use the backstitch in black thread. Then sew on a black seed bead to the end of each antenna. To give the butterfly a finishing touch, sew on yellow or gold seed beads along the swirls on its wings. See photo G.

Now sew about 15" of white ribbon to the top of your banner, with one end in each corner. Then, to cover your stitches, sew a white button in each corner.
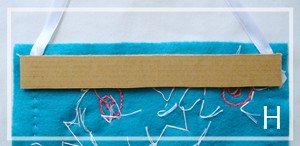

To keep your banner from sagging when hanging on the wall, cut about a 1" by 8" strip of cardboard, and glue it across the top of the back of the banner. Only glue the two ends of the cardboard strip, and be sure to place the glue behind the two large white buttons. This way no glue will show from the front. You could use any type of glue that you would like, but we suggest using hot glue. See photo H.
Your beaded flower banner is now finished!
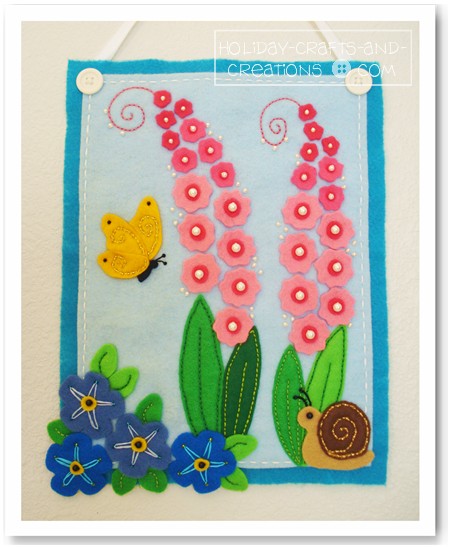
We hope you enjoyed this banner. We have many more easy sewing projects for all the other holidays! Be sure to check them out! And for more free summer crafts, click the link below.
Return to Summer Crafts from Easy Sewing Projects: Beaded Flower Banner

Vicky Says:
I just finished making this banner and I think it turned out pretty cute. Thanks for the great tutorial! I made it for my new granddaughter's nursery. Lesley Says:
Just beautiful! A perfect project for the Summer holidays. :)Tammy Says:
I LOVE this! The snail is so adorable. Cute! Elisia Barros Says:
Ficou muito gracioso. (This is very nice of you.) barbara Says:
This is so cute! I'm going to make this with my granddaughter this summer. This is just what I was looking for. I needed a fun sewing project we could do together. Thanks so much!!
Easy Sewing Projects: Beaded Flower Banner


