
Homemade Christmas Ideas:
Mini Christmas Banner – JOY
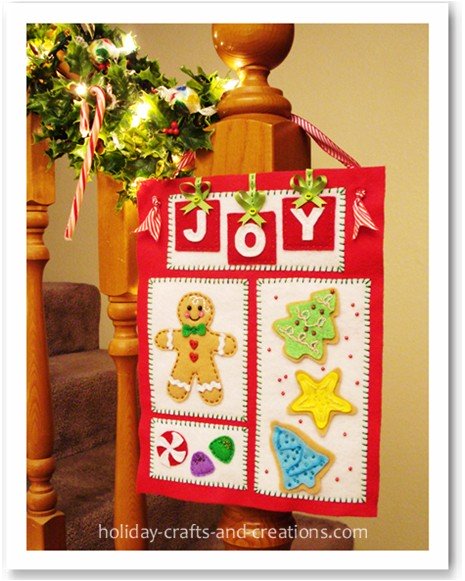
If you have been looking for some homemade Christmas ideas, then this mini Christmas banner could be a great project for you. This cute banner is sure to bring a touch of Christmas joy to your home. This little banner uses simple embroidery stitches that are very easy to do. This mini banner is the perfect size to hang on your door, in your kitchen, on your banister, or just about anywhere! So deck your halls this year with this sweet little banner of Christmas goodies.
Homemade Christmas Ideas: Mini Christmas Banner – JOY
Materials For Homemade Christmas Ideas:
Mini Christmas Banner – JOY
What You Will Need
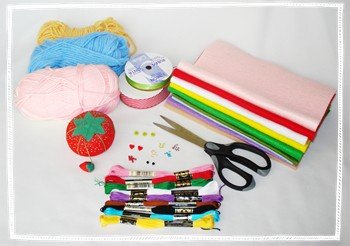
- Felt: banner piece – full sheet red (9” x 12”)
Other felt – white, tan, yellow, blue, light green, green, pink, purple, red
- Embroidery thread: white, green, red, brown, black, pink, purple, blue, yellow
- Green ribbon (1/4" wide, about 27” long)
- Striped ribbon: (7/8” wide, about 24” long)
- 3 green buttons (1/4" – 1/2" wide)
- 2 small heart buttons
- 2 black beads (about 1/8” wide)
- Small red beads (about 22, also about 1/8” wide)
- Seed beads: purple, green, blue, yellow
- Yarn: yellow, light blue, pink
- Large eyed needle
- Thin bead needle
- Pins and regular needle
- Scissors
Instructions For Homemade Christmas Ideas:
Mini Christmas Banner – JOY
Step 1:
Print and cut out the Joy Christmas Banner template. Trace and cut out the patterns with the following felt colors. Also the type of stitches used are listed by each photo.
All background pieces are white.
All background border stitches are done with the
whip stitch
in green embroidery thread.
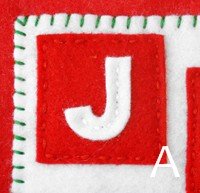
Squares – red felt
Letters – white felt
Square Stitches -
running stitch
in red thread
Letter Stitches - running stitch in white thread
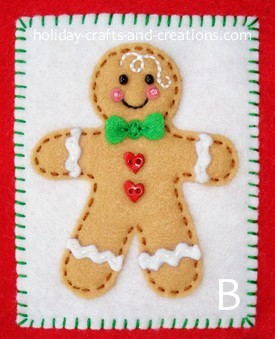
Gingerbread boy - tan felt with running stitch in medium to dark brown thread
Arms and Legs Frosting - white felt with running stitch in white thread
Hair -
backstitch
in white thread
Eyes - two black beads
Mouth - backstitch in black thread
Cheeks - pink felt with a
French knot
in the center in pink thread
Bow Tie - green felt, use the backstitch in green thread to stitch a circle in the center of the tie. Also make one stitch on either side of the circle.
Two Heart Buttons
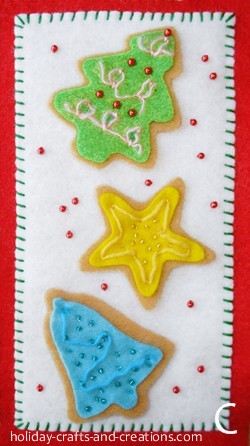
Christmas Tree:
Cookie - tan felt
Frosting - light green felt
Decoration - pink yarn, red beads
Star:
Cookie - tan felt
Frosting - yellow felt
Decoration - yellow yarn and yellow seed beads
Bell:
Cookie - tan felt
Frosting - blue felt
Decoration - blue yarn and blue seed beads

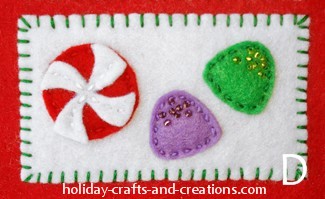
Peppermint Candy - red felt circle with running stitch in red. White stripes with running stitch in white.
Gum Drops - purple and green felt with running stitch in purple and green thread. They also have purple and green seed beads along the top.
Step 2:
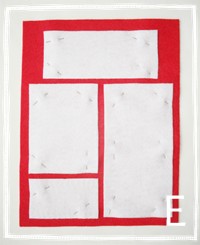
Now that you know what colors of felt and thread to use, cut out all the pieces from the patterns and then evenly space the 4 white background felt pieces on the 9" x 12" red felt.
Pin the 4 felt pieces into place so that the felt won't move as you are stitching them onto the red banner. See photo E to see how this will look. Sew the pieces on using the whip stitch around the edge.
Step 3:
Now stitch the decorative pieces onto their appropriate background using the stitches listed above by each of their photos. Also see the photo at the bottom of this page as a guide.
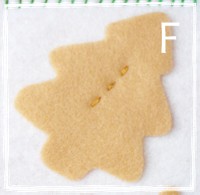
To anchor the tan cookies into place, sew two to three stitches in the center of each cookie. See photo F. Then anchor the frosting into place by stitching on each cookies’ decorations. The yarn on each cookie was separated down to one strand so that the yarn would not be too thick. The yarn was stitched down in just a few key places. Also stitch 15 to 16 red beads on the background around the three cookies. See photo C.
Step 4:
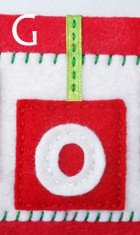
Now stitch on a strip of green ribbon to the top of the red “JOY” squares. You will want to measure out enough ribbon to go from the top of each red square, up to the top of the banner and over to the back. Now stitch the ribbon into place using the running stitch. Be sure to catch the piece of folded over ribbon on the back with your stitches. See photo G
Step 5:
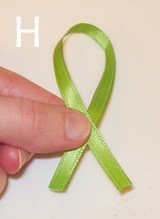
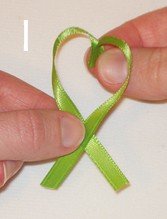
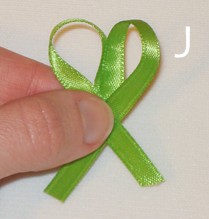
Next, make three bows. To do this, cut three pieces of your green ribbon, each about 7” long. Now, start the bow by crossing the ribbon ends over each other. See photo H. Now pinch the center of the loop in about 1/4" to 1/2". See photo I. Then bring the folded center of the loop down and line it up behind where the ribbon crosses. See photo J.
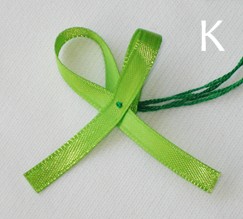
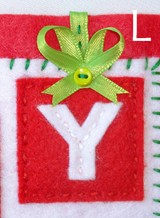
Now make a stitch through the center of the bow to hold it together. See photo K. Now cut the ribbon ends to your desired length. We cut a notch out of each end, which adds to the cuteness! See photo L.
Step 6:
Sew the bows onto your banner by stitching through the button. See photo L.
Step 7:
Measure out about 24” of your striped ribbon. Using a large eyed needle, thread your ribbon onto your needle. Poke your needle from the back to the front in the two upper corners of your felt banner. Tie a knot in both ribbon ends and cut the extra ribbon tails to your desired length.
Your Mini Christmas Banner is now finished!
Step 8: Optional
If your banner tends to bend forward while hanging on the wall, you could do this optional step.
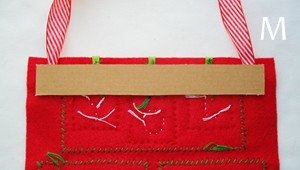
Cut about a 1" X 8" strip of cardboard and glue it to the back of the banner. See photo M. Only glue the two ends of the cardboard strip and be sure to place the glue right behind the two ribbon knots. This way no glue will show from the front. You could use any type of glue you would like, but we would suggest using hot glue.
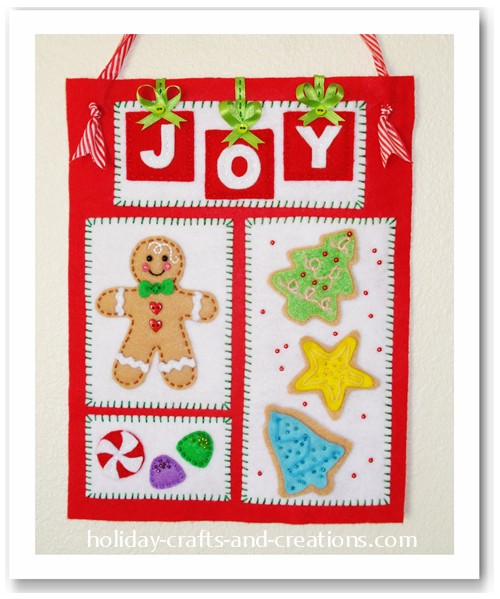
Now your Christmas banner is finished! This sweet little Christmas banner will add a charming holiday touch to your home. For more homemade Christmas ideas, please click the link below.
Return to Christmas Crafts from Homemade Christmas Ideas:
Mini Christmas Banner – JOY

sindy harth Says:
Love it!!
madison Says:
those are great ideas but i wish my cousins were down from pennsylvaia so i could have some help from one of my cousins that is a girl also
hello Says:
what a good thing to make thanks
sandielynn Says:
found this website tonight and like Heather, I love it! I love to do crafts and your explanations w/pictures is great! Thank you so much for your website
Melissa Says:
Thank you! SOOOO CUTE!
Roxi Smith Says:
beautiful job,xoxo
leticia millanez Says:
precioso trabajo para la puerta del cuarto de los niños. gracias por compartir. (Precious work for the bedroom door of the kids. Thanks for sharing.)
Martha Jacome Says:
Está muy bonito, felicitaciones y gracias (This is very beautiful, congratulations and thanks)
MARGARITA PINEDA Says:
MUY LINDO TRABAJO Y LAS EXPLICACIONES MUY CLARAS, FELICIDADES (Very nice work and very clear explanations, best wishes)
Kelli from Holiday Crafts and Creations Says:
Thanks Heather! We are so happy you have found our site and enjoy the ideas :) Happy sewing!
Heather H. Says:
I just came across this site and I am totally in Love with it. I am heading out to the store to buy materlias for the Boo and Joy banners. Thanks for your great ideas!!!!!
nt Says:
woa ! So cute ! thank you very much :D
Jackie M Says:
This is such a cute banner. I really like it and the gingerbread boy is so adorable. Thanks for the great banner template.
Homemade Christmas Ideas: Mini Christmas Banner – JOY