|
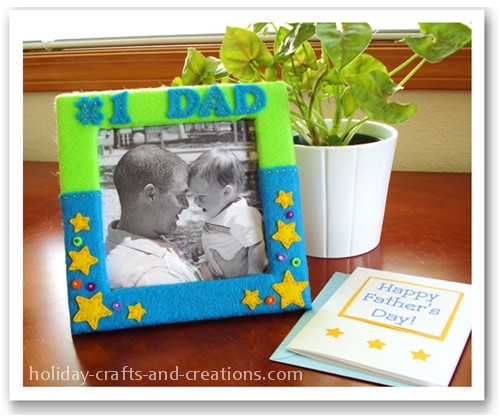
Homemade Fathers Day Gifts: Felt FrameIf you have been looking for ideas for homemade fathers day gifts, we hope you will give this one a try. This felt frame is a nice way to show your dad how special he is and how much he means to you. It is a very inexpensive project and pretty easy to make, but will mean a lot to your dad! Most felt projects like this one are easy, and with a little help, would be a great gift for a young child to give to their father. This felt frame also is a great project for giving old frames a new look. If you have any frame that's outdated or you just no longer like, this project will give it a new look. If you don't have any old frames, try searching a dollar store for a cheap frame to use.
Materials for Homemade Fathers Day Gifts: Felt Frame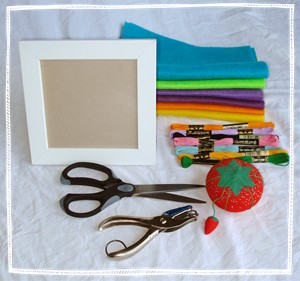
What you will need: Felt in colors of your choice (we used lime green, blue, yellow, 2 shades of purple, and orange) Embroidery thread (to match or contrast felt colors) Straight pins and needle Scissors Paper hole punch Paper and pencil Frame Note: The frame should have a flat border that is at least 1" wide. Anything narrower will be a little too small to sew on decorations. We used a frame with a 1" border for this project, but wider will also work. Instructions for Homemade Fathers Day Gifts: Felt Frame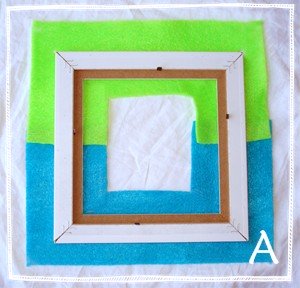
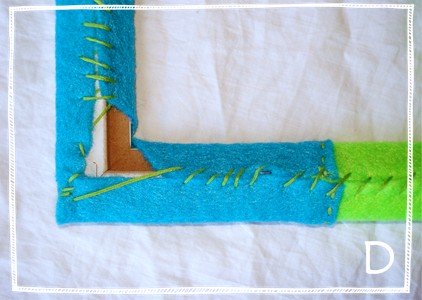
Step 1: First select the two colors of felt that you want for the background of the frame. We chose blue for the bottom half and lime green for the top half. Next, Overlap the edges of the two pieces of felt anywhere from 1/2" to 1". This will be your seam allowance when it's time to stitch the two pieces together. Lay your frame (without glass or backing) on the two pieces of felt that you just overlapped. Position the frame on the felt so that the bottom felt (blue) will cover the bottom 3/4ths of the frame and the green will cover the top 1/4th. Now measure and draw a line around the outside and inside of the frame that is at least 1" away from the edge. If the border of your frame is wider than 1", draw your line even farther away from the frame's edge. You want to be sure that there will be enough felt on the outside and inside of the frame so when wrapped around the frame, they meet in the back and can be sewn together. See Photo D to see what we are talking about. Then cut the felt along your drawn line. See Photo A. Step 2: Next, sew the two pieces of felt together using the basic running stitch. Now stitch an outline of the frame onto your felt. This will make it much easier to know where to stitch on the decorations. These stitches will be removed later before you attach it to your frame. To make this outline, make a paper pattern of your frame by tracing around the inside and outside of your frame onto a piece of paper. cut this pattern out, center it on your felt and pin it on. 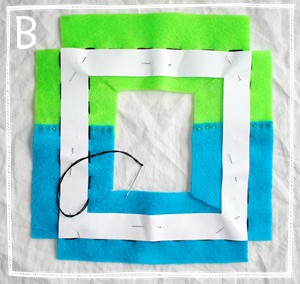
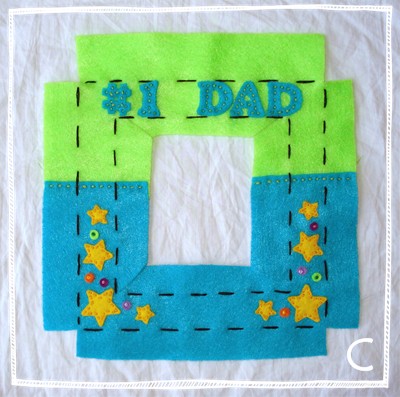
Step 3: Now that you know where the frame will be, cut out a notch on the outside corners, and make a diagonal cut to the inside corners. See Photo B. This is done so you can later easily wrap the felt around the frame. Make large stitches along the inside and outside border of the pattern, and then remove the paper pattern. Also see Photo B. Step 4: Print the star and letter template provided (.pdf file), and select the size stars and letters that will best fit your frame. We used three sizes of stars. Cut the stars and letters out of the felt colors of your choice. To make the small circles that are between the stars, we just used a paper hole punch. This does a pretty good job of punching through the felt, but you may have to trim the circles a little if it didn't punch all the way. We used four colors of felt for our circles. See Photo C.
Step 5: The best place to start sewing on the stars is in the bottom corners, and work outward from there. We sewed the largest stars in the two corners. Assuming you used yellow for the stars, use a nice contrasting color (we used orange) so the stitches are more visible. Seeing the stitches can add to it's charm! Both the stars and the letters are sewn on using a running stitch. As you're sewing on the stars, be sure to leave enough room between them for the circles. Place the circles between the stars where you think they look best and sew them on using a french knot in the center of each circle. Again, we used a contrasting color of thread because we thought it was cute to see the knot! See Photo C.
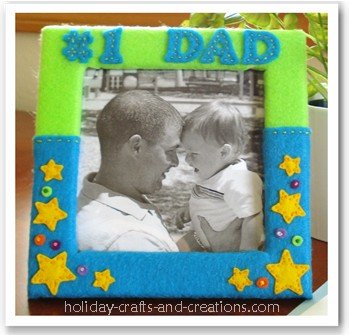
Step 6: After you have sewn on the stars, circles, and letters, remove the large outline stitches (ours were black). Again, see Photo C. Now it's ready to be stitched onto your frame. Line your frame up on the felt and wrap the inside and outside edges around the frame. The two edges should meet each other along the back. Now start stitching the two edges together using a whip stitch. See Photo D. While you're sewing, check the front every so often to make sure it's lined up properly along the frame. You may have to cut some small holes in the felt, depending on the types of flaps on your frame that hold the glass and photo in. Once the back is finished and tied off, your frame is all done and ready for your favorite photo of your #1 Dad! See, homemade fathers day gifts can turn out great!
For more homemade fathers day gifts and ideas, select the link below. Return to Fathers Day Crafts from Homemade Fathers Day Gifts: Felt Frame
Afsana Says: sara Says: ashleigh Says: anonymous Says: tapan Says: mohit Says: jenny Says: Anonymous Says:
|


