Scissors
Instructions For Homemade Valentine Ideas:
Mini Valentine Banner
Step 1:
Print and cut out the Valentine banner template. Trace and cut out the patterns with the following felt colors. Also the type of stitches used are listed by each photo:
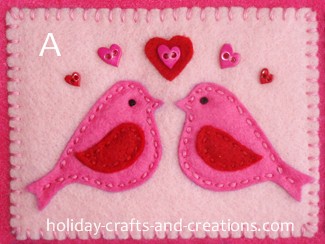
Bird background - light pink felt, whip stitch in pink thread
Birds - hot pink felt, running stitch in hot pink thread
Wings - red felt, running stitch in red thread
Birds' Eyes - French knot in black thread
Heart - red felt, attached with pink heart button
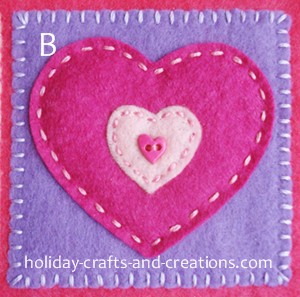
Background - light purple felt, whip stitch in light purple
Large heart - fuchsia felt, running stitch in hot pink
Small heart - light pink felt, running stitch in hot pink
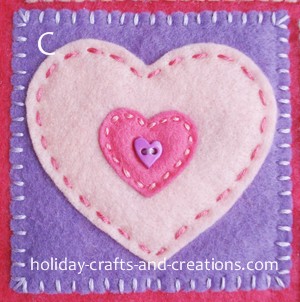
Background - light purple felt, whip stitch in light purple
Large heart - light pink felt, running stitch in hot pink
Small heart - hot pink felt, running stitch in pink
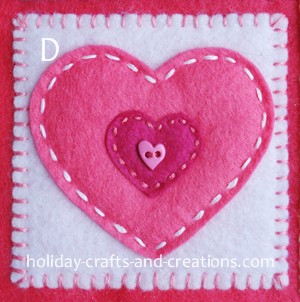
Background - white felt, whip stitch in pink
Large heart - hot pink felt, running stitch in white
Small heart - fuchsia felt, running stitch in hot pink

LOVE background - white felt, whip stitch in pink
Letters - red felt, running stitch in hot pink
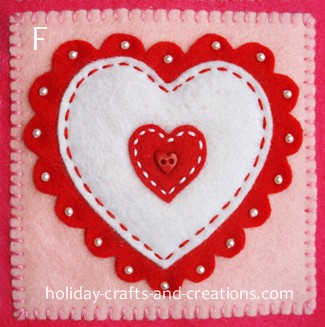
Heart background - light pink felt, whip stitch in pink
Scalloped heart - red felt, secure into place with only a few stitches in the center of the red heart.
Large center heart - white felt, running stitch in red
Small center heart - red felt, running stitch in white
Step 2:
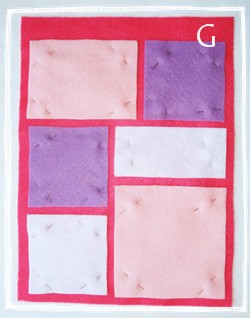
Now that you know what colors of felt and thread to use, cut out all the pieces from the patterns and then evenly space the 6 background felt pieces on the 9" x 12" hot pink felt.
Pin the 6 felt pieces into place so that the felt won't move as you are stitching them onto the banner. See photo G to see how this will look. Sew the pieces on using the whip stitch around the edge.
Step 3:
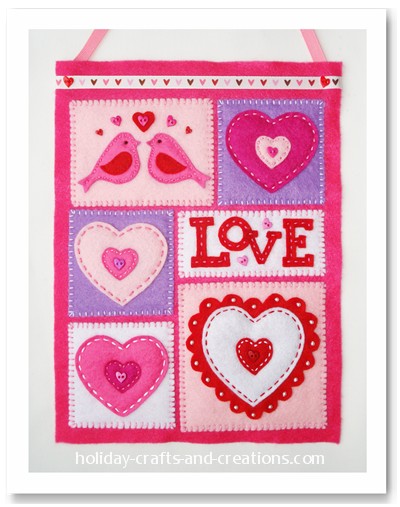
Now stitch the decorative pieces onto their appropriate background using the stitches listed above by each of their photos. Also see the photo at the bottom of this page as a guide.
To embellish the birds, sew on 5 heart buttons. See photo A. Sew a heart button to the center of each of the 3 hearts. See photos B through D. Also sew 2 heart buttons to the LOVE square. See photo E.
Step 4:
Secure the scalloped red heart into place with only a few stitches in the center. Then sew the white heart on using the running stitch with red thread. The center red heart is also sewn on using the running stitch with white thread. Then sew a heart button in the center of the small red heart. Now sew a pearl bead to the center of each scallop. See photo F.
Step 5:
Measure out about 15" of your ribbon. Sew the ends to the top corners of your banner on the back side. Make sure your stitches are placed where they will later be hidden by the piece of ribbon going across the top of the banner. Now measure out about 11" of your ribbon. This piece will be sewn on across the top of your banner. Center the ribbon across the banner and fold the extra ribbon ends around to the back side of the banner. To attach the ribbon to the banner, sew a heart button on each corner. Make sure that the ribbon on the back side gets tacked down with the button stitches.
Step 6: Optional
If your banner tends to bend forward while hanging on the wall, you could do this optional step.
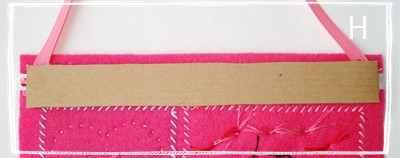
Cut about a 1" X 8" strip of cardboard and glue it to the back of the banner. See photo H. Only glue the two ends of the cardboard strip and be sure to place the glue right behind the two heart buttons. This way no glue will show from the front. You could use any type of glue you would like, but we would suggest using hot glue.
Your Mini Valentine Banner is now finished!
To find more homemade Valentine ideas, click on the link below.
Return to Valentine Crafts from Homemade Valentine Ideas -
Mini Valentine Banner

sandhya Says:
really a good one and awesome idea
Karen Says:
Am making for my newly wed Niece and husband, for their home.
Kate Says:
That is so adorable! I would love for you to link up at my Valentines party @ www.cheapcraftymama.com!
Jerri Says:
Love this! I'm featuring you at my Friday Favorites party this week! Come by and check it out! www.simplysweethome.com
Noelle Says:
Making it right now for our granddaughter's bedroom door. So darn cute and easy to further embellish. Thank YOU!
Paula Says:
I am getting ready to sew right now, everything is cut out, rather than using buttons I am using tiny rolled felt roses....
Paula Says:
I am going to buy my felt today, I just need more red! Thank you for the pattern and how-to!
natalia Says:
I really like th3s3 id3as which u shar3d thnx alot....this id3a was awsom3
monica lorente Says:
i did it and i love it very much!!!!!!!!!!!
thank you for that beautiful idea.
monica lorente Says:
i love this!!!!!!!!!!!!!!
Ingrid Says:
Pero qué cosita más bellaaa!!! Mil gracias por el tutorial. Besos desde Venezuela! (But what a most pretty thing!!! Thanks for the tutorial. Kisses from Venezuela!)
Maria Regina Teixeira Hunziker Says:
Very beautiful! Thank you very much.M.Regina.
Komal Says:
Its lovely...
patty Says:
muy bonito.
Beta Says:
Thanks for this beautiful idea! I have thought about sharing it with my readers and I hope you are not sorry if I have inserted it in my post of St. Valentine (http://bimbumbeta.blogspot.com/2010/02/un-amore-di-biglietto.html).
Regards, Beta
Silvia Says:
I love This!!!! So Beautiful
telma Says:
cute!!! cute!!!!
Charo Garrido Gómez Says:
Muy bonito!! (Very beautiful!!)
quiane Says:
cute!!!
Quiane
www.arte-com-quiane.blogspot.com
claudia Says:
Beautiful.
Cassia Says:
I just loved it! It's a adorable idea and a fantastic how-to!!
Kimberly Says:
This is just too cute! NaLa Says:
This is just too cute, and wonderful how-to!
Donna Says:
I REALLY love this! I am going to have to make one. I better get started, I sew rather slow lol.
Homemade Valentine Ideas - Mini Valentine Banner