
Polymer Clay Tutorials:
Candle Holder Crafts
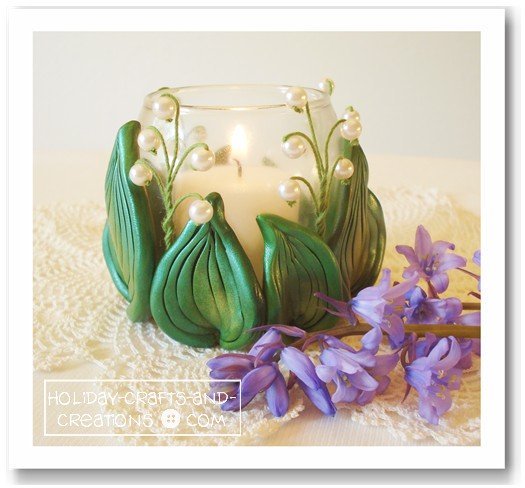
One of our most beautiful polymer clay tutorials is this lily of the valley flower which we molded onto a votive glass candle holder. This votive glass candle holder would make a lovely homemade gift for Mother’s Day. Overall, this is a pretty quick and easy craft project to do.
So if you have been looking for some unique candle craft ideas, then try this easy lily of the valley candle holder. It would make a wonderful gift for your mom this Mother's Day!
Polymer Clay Tutorials: Candle Holder Crafts
Materials for Polymer Clay Tutorials:
Candle Holder Crafts
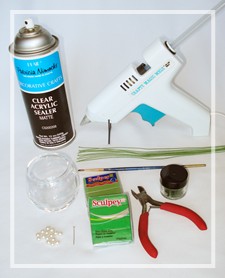
What You Will Need:
- Green polymer clay
- Votive glass candle holder
- Floral wire (32 gauge)
- Wire cutters
- Straight pin or needle
- 20 Pearl beads (1/4" wide)
- Acrylic sealer
- Hot glue gun
Optional:
Instructions for Polymer Clay Tutorials:
Candle Holder Crafts

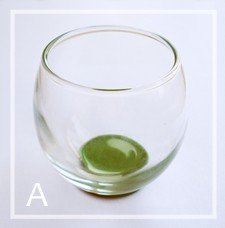
Begin by rolling a ball of clay that is about 1/3 as wide as the base of your candle holder. Then smash the ball of clay with the bottom of your candle holder until it is about 1/8” to 1/4" thick. See photo A.

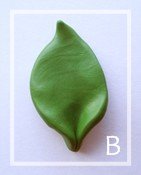
Next, roll out another ball of clay. This will become a leaf, so it can really be as big or small as you would like it to be. Start to flatten out the clay and create points at both ends. At one end, pinch the clay together inward. See photo B.

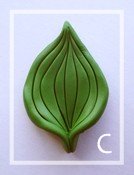
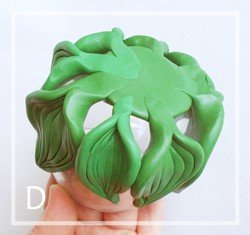
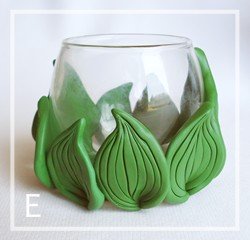
Once you have the leaf in the shape you like, take your pin or needle and run it along the leaf making lines that run up and down the leaf. See photo C. Continue making leaves, and press them onto the side of the candle holder as you go. Don't worry if your leaves end up being different sizes, because that probably looks more realistic anyway. Make sure the base of each leaf touches the clay on the bottom of the candle holder so it is held in place. See photo D. Photo E then shows how the candle holder should look once you have completed all the leaves.

Before you put the candle holder in the oven, you should coat the leaves with Pearl Ex using a paintbrush, if you wanted to do this optional step. Be sure to wipe off any excess Pearl Ex from the glass of the candle holder.
Now place the candle holder on a baking sheet and bake it in the oven according to the instructions on the clay.
After the candle holder has come out of the oven and has cooled completely, coat the clay with the acrylic sealer. Try your best to not get any acrylic sealer inside the candle holder.

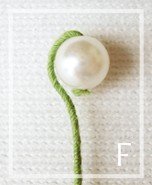
The next step is to make the pearl flowers. To do this, first measure and cut a length of wire that is about as tall as your candle holder. Then place a pearl bead onto the top of this wire, and curl the bead over so it can’t slip off. See photo F.
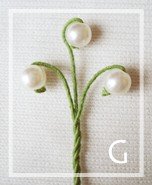
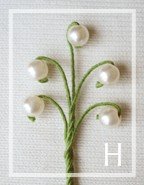
Now cut two more pieces of wire that are slightly shorter than the first. Put a pearl bead on the end of each wire and curl it over like you did for the first one. Now place one of these wires on each side of the first wire, with the pearl beads curling in opposite directions. Then twist all the wires together so they stay in place. See photo G. Repeat this with yet two more pieces of wire that are just slightly shorter still, and twist them together with the previous group. See photo H.
Now make three more of these "flower sprigs".

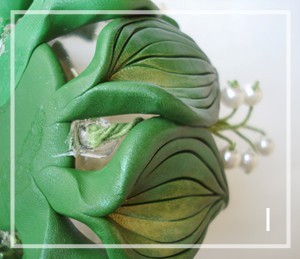
Place the sprigs evenly around your candle holder by tucking the stem in between the leaves. Then hot glue the base of each stem to the glass in between the leaves. This shouldn’t be visible when viewing the candle holder. See photo I. Be careful to not let any extra hot glue stick to the bottom of your candle holder, or it will be tippy. Your candle holder is now complete and ready to give to mom on Mother’s Day!
For more craft ideas for Mothers Day, click the link below.
Return to Mother's Day Crafts from
Polymer Clay Tutorials: Candle Holder Crafts

Peg Says:
I create jewelry and I'm always trying to find imaginative little containers to place my pieces into as part of the gift. These lovely little lily of the valley cups will do nicely. So pretty on a lady's bureau or as gifts to the women in a bridal party or, for a baby shower with tiny babydolls in them. Endless possibilities.Ash Says:
wow! thx so much.... this is super cool, i luv it! m gonna try it out...=)Selina Castellino Says:
wonderful creationelizabeth r. Says:
very pretty.... love it all <3deanna rae Says:
This is so beautiful a sure sign of spring!roxanne Says:
i love it i am gonna make my mum oneNapolde Says:
wow ... beautiful !!! ...thank you so much for the idea and the tutorial :)Afsana Says:
awesome.....Uzair waseem Says:
It is very nice, I'll try to make it.Kelli of Holiday Crafts and Creations Says:
Hi EP! Yes, we did bake the glass candle holder with the clay on it, which should be fine since it bakes at a low temperature. As far as the Pearl Ex, I'm not sure what you mean by seeping inside the candle holder... We just explain to wipe any Pearl Ex powder off the glass so only the leaves have a pearl look, and not the glass. But this isn't crucial. I hope this helps answer your questions! Thanks so much for visiting our site :D EP Says:
This is so very pretty. Did you bake the glass along with clay or just the clay itself? And why must we avoid the pearl ex from seeping inside the candle holder ?sahithi Says:
thankx for sharing ,very neat work.Tania Barryo Says:
Beautifulmarellyn buehler Says:
so beautiful.... thanx for the tuteSimona Says:
I like the candle holder craft. The leaves cann be jused for a necklase or a pendant. I maked once for my friend a candle holder. She liked wery much. By and have a nice time.