|
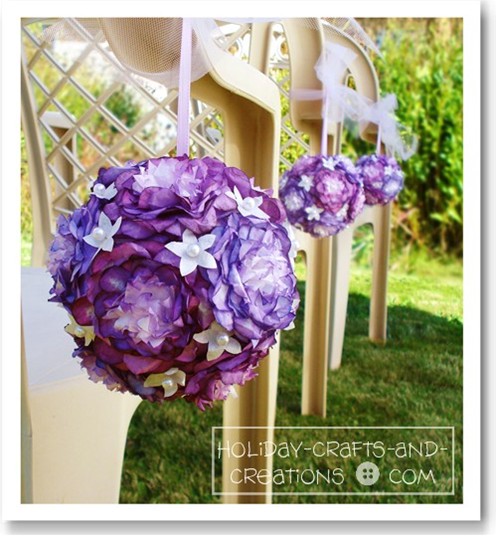
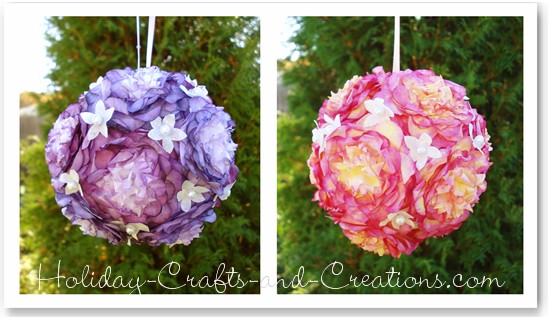
Wedding Pomander Balls: Peony DesignThese peony pomander balls (also known as wedding kissing balls) are very elegant and easy to make. And if you are on a tight budget and need some cheap wedding flower ideas, then these pomanders would be the perfect choice. These pomander balls could be used to decorate the pews, or your reception or even as a bridal bouquet design if you are planning on making your own bouquet. These pomanders make really beautiful, inexpensive wedding flowers because they are made from coffee filter flowers. And they look just like the real thing! We will show you step-by-step how to make these pomanders, including the paper flower instructions.
Materials For Wedding Pomander Balls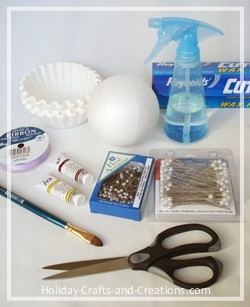
How To Make Paper Flowers: Peony Design
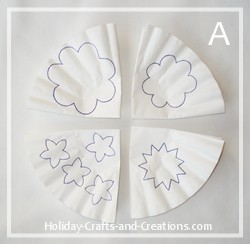
Print and cut out the paper flower patterns. Since you'll be tracing around the patterns a lot, it might be a good idea to use cardstock or even lightweight cardboard for your paper flower patterns. Now quarter fold 2 or 3 layers of coffee filters and trace the paper flower patterns onto them. See photo A. Note: Each flower requires 4 "large petals", 4 "medium petals" and 4 "centers". So since the coffee filters are folded into quarters, you basically need 3 coffee filters to make one flower. To make things faster, you could also fold 2 filters together in which case you will need to cut out 6 of each petal design to make one ball. And if you decide to fold 3 at a time (remember it will be harder to cut) you will need to cut 4 of each design to make one ball. One 4" ball takes 12 peony flowers, which requires 36 filters. One filter will make 16 accent flowers, and one ball needs around 20.
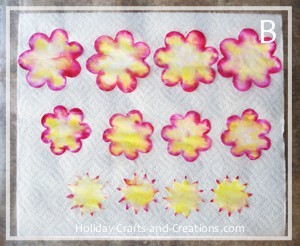
After cutting out the amount of flowers that you'll need, line up one flower set per sheet of wax paper (since moisture goes through wax paper, you might want to layer some paper towels under the wax paper. We thought it was a good idea to keep one flower set per sheet of wax paper because it helps keep you organized and it makes assembling them easier. See photo B The first step to painting your flowers is to lightly spray them with water. Then paint them with watercolor paint. You can use just one color, or you can paint the centers a different color for a two tone look.
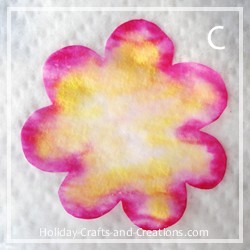
For the best look, get your paintbrush saturated with paint, and run the brush along the edge of the flower and allow the color to bleed out into the petals. Then come back with your second color and fill in the center of the flower. See photo C for an up close look at one of the flowers. If you want your small accent flowers to be colored, be sure to get them painted now as well.
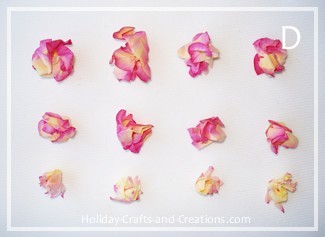
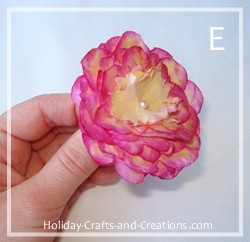
The petals will dry the fastest if you lay all the pieces of wax paper out on a large table, in only one layer. If you stack the pieces of wax paper, it may take a little longer for them to dry. At one layer, they should take about a day or less to dry completely. After the petals have completely dried, it's time to assemble them into flowers. First, to give your peonies some dimension so that they don't just lay flat, each petal will need to be gently wrinkled up into a loose ball. See photo D. Now carefully open each piece, leaving them a little ruffled (don't flatten them down too much). Next, stack them, and be sure to rotate the petals so they don't all line up with each other. There should be four large petals on the bottom, and then four medium petals, and then four centers on top. To hold your flower together, stick a small pearl head pin (1.5 inches) through the center of your flower. See photo E.

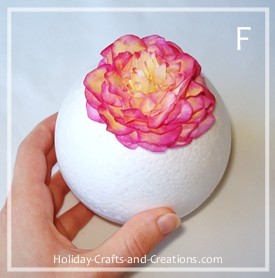
Now take the flower you just made and begin assembling your pomander ball. You simply stick the pearl head pin that's holding your flower together, into the Styrofoam ball. See photo F. You can fluff each flower as you go, but you might also need to do some fluffing once the pomander has been completed. Try to evenly space your flowers on the ball. Each 4" ball needs 12 flowers. You will have small gaps between the flowers, but don't worry because you will fill in the gaps with some small accent flowers.
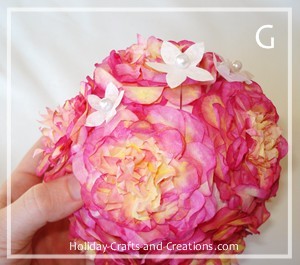
Once your pomander ball has all 12 flowers, begin filling in the gaps with your accent flowers. Each ball will need between 18 – 20 accent flowers, or more depending on the look you want. If you want really showy pearls in your pomander, use a large pearl head pin (3 inches) to stick the accent flowers into the ball. See photo G.

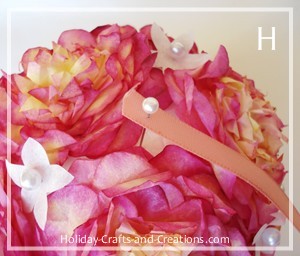
The final step is to attach a piece of ribbon to the top of your pomander with a small pearl head pin. See photo H.
Now that your pomander ball is complete, you can do some final fluffing of the flowers just in case some got flattened while you were assembling it.
So to save a fortune on flowers, try these beautiful but also very cheap wedding bouquets and reception decorations made from paper flowers. And for more pomander ball ideas or more paper flower crafts, click the link below.
Return to Wedding Crafts from Wedding Pomander Balls: Peony Design
Kat Says: Kelli from Holiday Crafts and Creations Says: Ruquiyah Foye Says: Id'z Says: cel Says: Macel Says: BUmbles Says: DIY Bride Says: Nisha Gore Says: Simony Says: ivorypearlbridal.wordpress.com Says: Anonymous Says: Debra Says: Derek Asszony Says: creativejewishmom/Sara Says: Sara Says: www.SaraInAkko.blogspot.com Sandy Ang Says: Maya Says: |


