Scrapbooking Card Ideas: Daffodil Crafts
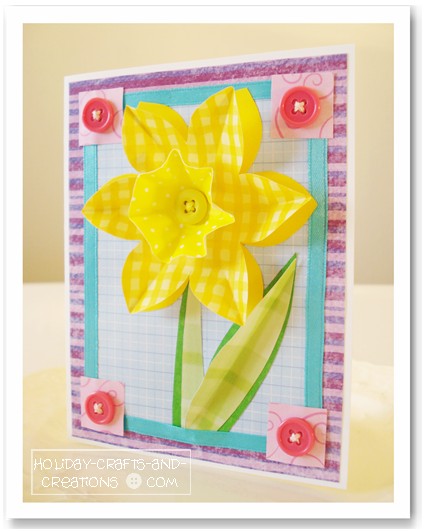
Looking for some scrapbooking card ideas for Easter? This daffodil card is really easy to create and yet makes an adorable Easter greeting or decoration. We have provided the instructions and free card templates needed to create this card. So gather up some spring pastel scrapbooking paper and buttons and have some fun!
Scrapbooking Card Ideas: Daffodil Crafts
Materials For Scrapbooking Card Ideas:
Daffodil Crafts
What You Will Need:
- Scrapbooking paper: pastel colors
- 4 pink buttons (about 1/2" wide)
- 1 yellow button (also 1/2" wide)
- embroidery thread (pink and yellow)
- Ribbon (blue/aqua, 1/4" wide)
- Sewing needle
- Scissors
- Stick glue and double sided tape
- White card stock paper
- Daffodil free card templates
Instructions For Scrapbooking Card Ideas:
Daffodil Crafts
Step 1:
To begin your card, you will want to start with a piece of white card stock paper that is 8-1/2" by 5-1/2". So basically cut the piece of card stock paper in half. Then fold this piece in half to create your blank card.
Then, print out the Daffodil free card templates and cut each pattern.
Step 2:
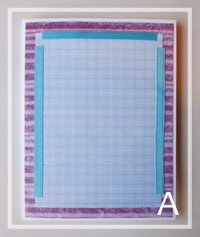
Trace the larger rectangle onto a piece of purple scrapbook paper, and the smaller rectangle onto a piece of blue scrapbook paper. Glue or tape the purple piece onto the front of your card, and then glue or tape the blue piece centered on top of that.
Next, cut two pieces of ribbon that are about 4" long and one piece that is about 3" long. Glue on the back of the 3" piece and place it across the top of the card over the seam of the purple and blue paper. Then do the same thing for the other two pieces, placing them on the two sides of the card. See photo A. The bottom will get a piece of ribbon later.
Step 3:
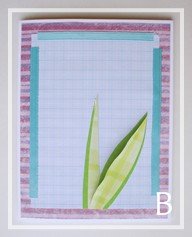
Now trace and cut out two stem pieces and two leaf pieces. We used two different shades of green scrapbook paper for this. Glue one of the stem pieces down in the center of the card. Be sure to line it up with the bottom edge of the blue background piece (we glued the darker green stem down first). Then glue the second stem piece down over the first, but off to the side a little so you get a layered look.
Then glue the darker leaf piece down off to the right of the stem. Before gluing the second leaf piece down over it, fold it in half length-wise. Then only glue on the back of the right side of the leaf and place this down in the middle of the first leaf piece. See photo B. By doing this, half of the leaf is folded out.
Step 4:
You can now cut a second piece of ribbon that is about 3" and glue this down over the bottom seam of the purple and blue paper (over the base of the leaf and stem).
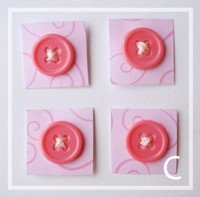
Then cut out four squares in pink scrapbook paper. Place a pink button in the center of each one and sew it on with pink thread. See photo C. You could also simply glue the buttons on, but you would need hot glue, or a lot of Elmer's glue for this.
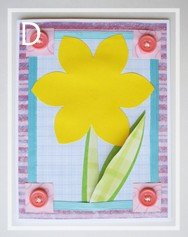
Using the double-sided tape, place one of these squares in each corner to cover the ends of the ribbon. See photo D.
Step 5:
Cut out a daffodil shape in yellow scrapbook paper or plain yellow card stock. Then glue this piece down onto your card, covering the top of the stem. See photo D.
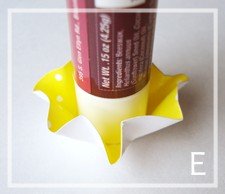
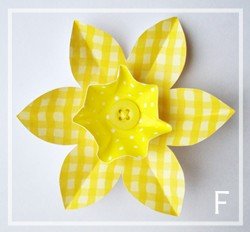
Cut out a second daffodil shape in yellow scrapbook paper, different (and lighter) than the first. Lightly fold each of the petals in half so that they each have a crease down the center. See photo F. Then trace and cut out one circle in a different piece of yellow scrapbook paper. Place something round and flat in the center of this circle (we used a stick of chap stick which is about the right size) and fold the circle up around it. Try to make the circle fold up with even folds in and out. See photo E. This makes the trumpet part of the flower.
Step 6:
Place the trumpet part in the center of the daffodil piece with the folded petals. Then place a yellow button in the center of the trumpet and sew the button down using yellow thread. This also anchors the trumpet to the daffodil shape behind it. See photo F.
Now all that is left to do is to glue or tape the flower/trumpet onto the card over the first daffodil shape that you glued down. Then your daffodil card is complete and ready to give to someone to brighten their Easter!
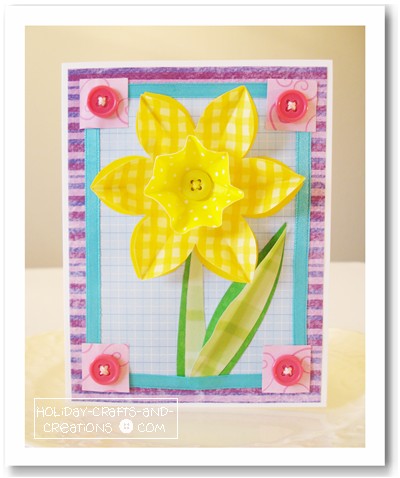
For more scrapbooking card ideas, visit some of our other holiday pages! We hope you have enjoyed this scrapbooking project!
Return to Easter Crafts from Scrapbooking Card Ideas: Daffodil Crafts

K!ttyx Says:
Love the daffodil, so creative and realistic in shape!!! Thank you very much!
hello Says:
Very pretty and stylish. I love it!
thingymajigy Says:
its so cool
Wendy Says:
Stunning thanks
rita albuquerque Says:
simplesmente lindo e delicado (simply beautiful and delicate)
Katelyn Says:
Excellant craft idea, Looks Brillant :-)
HAnnah && Cassisy Says:
WOW KOOOOO Linda Says:
Cute. Thanks


