
Thanksgiving Crafts To Make:
Felt Garland
If you have been looking for Thanksgiving crafts to make, then this "Thankful" garland would be a great project for you. This garland will add a splash of Thanksgiving color to your home! It would look great over your fireplace mantle, over a large picture, or over a display of Thanksgiving decorations as shown above.
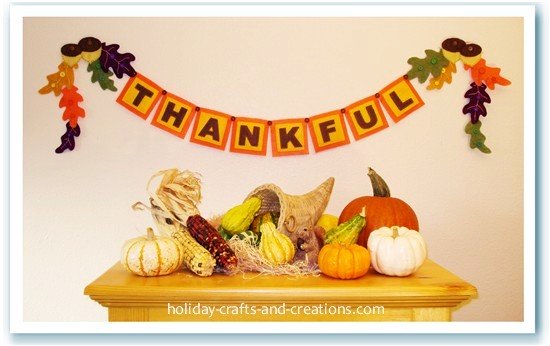
Materials for Thanksgiving Crafts to Make:
Felt Garland
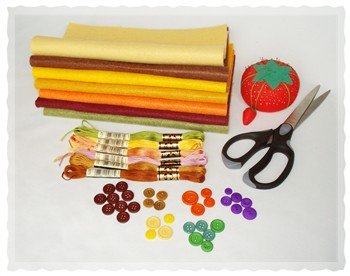
What You Will Need:
- Felt: brown, yellow, gold, orange, olive green, tan, dark cherry
Embroidery thread: brown, golden brown, yellow, light orange, olive green, light purple
Buttons:
9 brown, 6 purple,
4 tan, 4 orange,
4 yellow, 6 green
Scissors
Needle

Instructions for Thanksgiving Crafts to Make:
Felt Garland
Step 1:
Print and cut out the Thanksgiving Garland template. Cut the pattern pieces out of the following felt colors:
- Large square: Orange
- Smaller square: Yellow
- Letters: Brown
- Acorn tops: Brown
- Acorn bottoms: Tan
- Leaf #1: Dark cherry & olive green
- Leaf #2: Orange & dark cherry
- Leaf #3: Gold & orange
- Leaf #4: Olive green & gold
- Leaf #5: Dark cherry & olive green
Step 2:
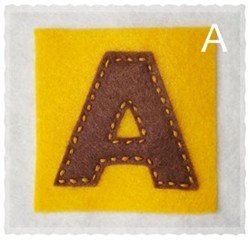
Start by sewing the letters to the yellow squares using the running stitch, with golden brown thread. See photo A.
Step 3:
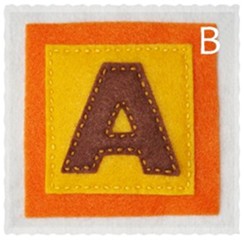
Now sew the yellow squares onto the larger orange squares, using the running stitch with yellow thread. See photo B.
Step 4:
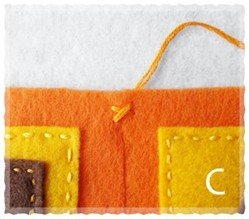
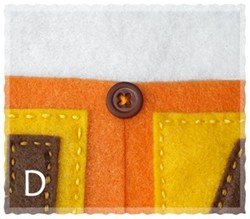
Next, sew the orange squares together with two stitches at the top corners. Be sure to spell out “Thankful”. See photo C. Now sew a button on over the stitches to hide them. See photo D.
Step 5:
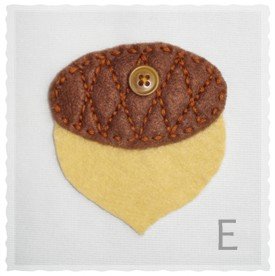
Sew the acorn top to the bottom by stitching around the edge using the running stitch in brown thread. Stitch the diagonal lines using the backstitch in brown thread. See photo E. Then sew a tan button in the center of each acorn top.
Step 6:
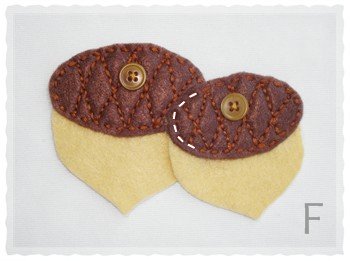
Sew two acorns together (one large and one small). Overlap the small one on top of the large one. Using the same color of thread (brown), re-stitch over the few running stitches on the top acorn that overlap the acorn underneath. See the white dashes in photo F.
Step 7:
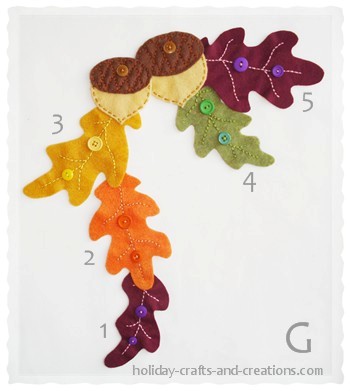
Stitch the veins in each leaf using the backstitch. You can use photo G as a guide for the vein placement.
Step 8:
This step will be done once for the right side of the garland and once for the left side. It will be done exactly the same for both sides, but just keep in mind they will be mirror images of each other.
Now sew the leaves and acorns together. See photo G as a placement guide. Sew the tip of leaf #2 to the base of leaf #1 and then the side tip of # 3 to the base of #2. Just re-stitch over about four or five of the vein stitches on the leaf tips to anchor the two leaves together. Now sew the base of leaf #3 to the side of the small acorn. Sew them together using the running stitch along the bottom edge of the acorn. Sew leaves #4 & 5 onto the side of the large acorn. For the acorn bottom stitches, use the golden brown thread.
Step 9:
Now sew two buttons onto each leaf.
Step 10:
Attach one leaf cluster to each side of the garland by sewing an “X” through the tip of both leaves #5. Do this the same way you attached each letter square to each other. See photo C & D.
Step 11:
To hang the garland, create a small loop of thread behind the large acorn. To do this without the stitches showing on the front, make your stitches through the large acorn’s button. Create a loop on the backside of the acorn and then knot off your thread.
Your Thanksgiving garland is now finished!

For more Thanksgiving crafts to make, click on the link below.
Return to Thanksgiving Craft Ideas from
Thanksgiving Crafts To Make: Felt Garland

ct ramiah Says:
it was really cute!!! =)
Free Felt Patterns Says:
Fantastic! I love all of your banners, and I shared this one on www.FreeFeltPatterns.com today. Thanks so much for such a great website.
Becky Says:
I love, love, love this. I have already starting making one for a Thanksgiving swap I'm doing. Thanks
Regina Gomes Says:
Congratulations!! I've never seen anything as beautiful and inspiring to show our love and dedication to ours!