
Thanksgiving Crafts To Make:
Indian Corn Place Cards
Looking for some really cute Thanksgiving crafts to make? Try making these Indian corn place cards! These little bags of candy almost look like real Indian corn, and make great treats for your guests to take home or snack on after dinner. The younger guests are sure to love them too! Set one at each plate with your guest's name on it as a place card or set them up in a cornucopia to make a unique centerpiece for your table.
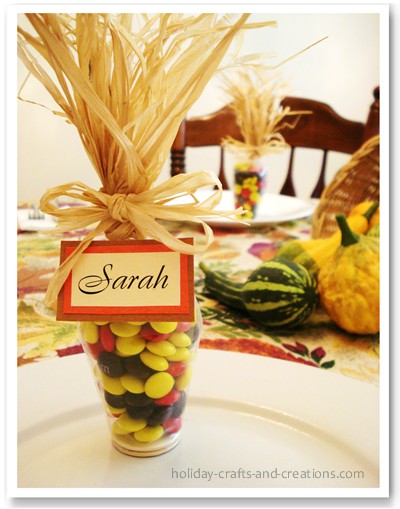

Materials for Thanksgiving Crafts to Make: Indian Corn Place Cards
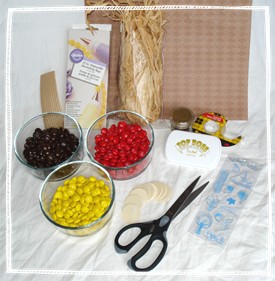
What You Will Need:
Clear pastry bags (12")
Wooden circles (about 1-1/4” diameter)
M & M’s (yellow, red & brown)
Double sided tape
Twisty ties (tan)
Raffia
Scissors
Optional:
Brown scrapbook paper
Gold embossing powder and embossing ink
Small autumn stamps
Colored paper for a name tag
These supplies would be used to decorate the wooden circles on the bottom of the corn, and for making a name tag.
Instructions For Thanksgiving Crafts to Make:
Indian Corn Place Cards
Step 1:
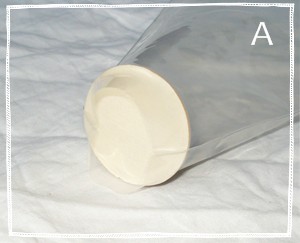
First, take out a clear pastry bag and two wooden circles (which can be found at most craft stores). Then measure up about 3 inches from the tip of the pastry bag and cut the end off. Take one of the wooden circles and put it in the pastry bag, letting it fall down to the end. Try to not let the circle fall out the cut off tip. The goal here is to get the circle to form a flat bottom to the pastry bag. To do this, push the circle evenly down until it fits snugly in the tip. See photo A. We admit this part can be a little tricky, as the circle will want to keep flipping sideways rather than lying flat. Just keep trying! Once you get the hang of it, it will be easier. The reason we suggest cutting the tip of the bag first is so that you can try to fit it in place from both sides.
Step 2:
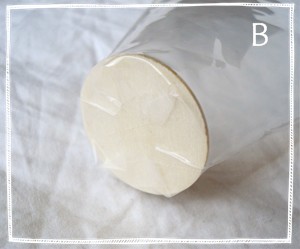
Once you have managed to get the circle in place you will want to tape down the excess plastic on the end. You should have no more than about a 1/2" of plastic to tape down. If there is more than this, trim some off.
To tape down the plastic, take several pieces of double-sided tape and place them on the underside of the wooden circle through the cut off tip. Be sure to have one hand on the other side of the circle so it is secure and doesn’t flip. Then, still with one hand on the inside, fold the extra plastic over and press it down onto the wooden circle. Most of the plastic should now be stuck to the circle. See photo B.
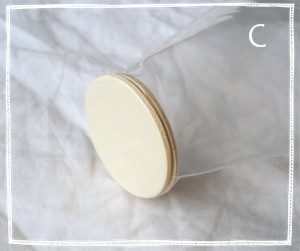
Next, apply more double-sided tape to the folded over plastic, and press a second wooden circle on top of this. You should now have a nice flat bottom to the pastry bag. See photo C.
Step 3:
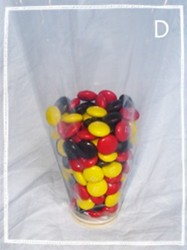
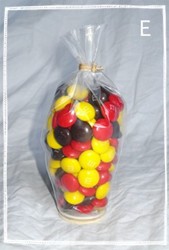
Next, start filling up the bag with a random assortment of the red, yellow and brown M & M’s. Fill up the bag about 3 to 4 inches high with the candy. See photo D. Then tie off the top with a tan twisty tie. Cut most of the remaining plastic off so only an inch or so is left. See photo E.

Step 4:
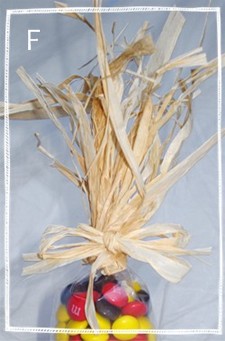
The next step is to put on the raffia so that it looks like a corn husk on the end of an ear of corn. Since most raffia will come as very long strands, gather about 4 or 5 strands and hold the ends in one hand. Now, with your fingers spread apart, wrap the raffia around your hand, like you are winding up a long piece of string. Keep looping it around and around your hand for the entire length of raffia. As you slip it off your hand, pinch it together (towards one end) so it doesn't unwind itself. The next step is to take the pinched end and carefully start to relax the tight pinched bundle (don't let go though). You want the tight pinched bundle of loops to be a little flatter or to widen out a little in your hand. Now take your bag and place the tied off top portion in your flattened out bundle of loops. Then, without letting go of the raffia loops, wrap the raffia around the top of the bag. The goal is to have the bundle flattened out enough so that you can wrap this bundle of raffia around the entire tip of the bag. As you wrap the raffia around the bag, just keep working the bag into the center. Then anchor the raffia in place with another twisty tie. Then to hide the twisty tie, we took a shorter piece of raffia and tied a bow around it. Finally, cut open the looped ends on the top, so that it looks more like a real ear of corn. See photo F.
For the name tag, simply print out your guest's name in a nice font, border it in fall colored paper, and attach it under the bow using a piece of double sided tape.
Step 5:
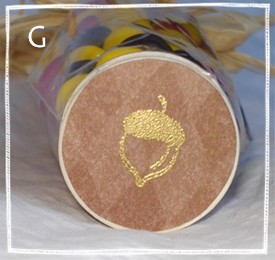
The last step is optional, but will add a cute detail to this Thanksgiving treat. In this step, we will add a stamped image to the bottom of the wooden circle. Our autumn stamps are by KI Memories, and we found them at Joann Fabric and Craft. The acorn and the leaves were the right size and were cute so we chose those to use.
First, cut out a circle from your brown scrapbook paper by tracing around your wooden circle. Then, using gold embossing powder, make an embossed stamp in the center of the circle. You can learn how to emboss by visiting our
Embossing Stamps page.
Then tape this stamped circle to the bottom of the candy bag. This gives each corn a little more detail and makes them all unique! See photo G for an up-close picture.
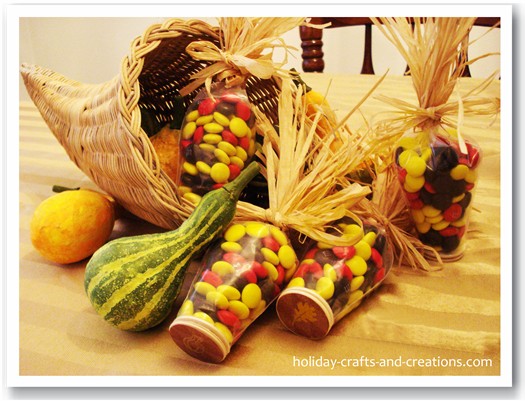
If you would rather, these Indian corn treat bags could also be grouped together and placed in a cornucopia along with some fake or real fruit and vegetables. This would make a fun centerpiece for your Thanksgiving dinner table.
We hope you enjoyed this Indian corn place card idea! If you are looking for other Thanksgiving crafts to make, please click on the link below to return to our Thanksgiving crafts home page.
Return to Thanksgiving Crafts from Thanksgiving Crafts to Make:
Indian Corn Place Cards

jojo Says:
genial merci (great thank you)
Maria Says:
coool i like this !!!!
My Creative Way - Raychel Says:
You are amazing! I featured your creative way today!
http://mycreativeway.blogspot.com/2010/11/diy-thanksgiving-place-card-ideas.html
Jackie Says:
This is so cute a sure to be a big hit at dinner
Laquisha Says:
Looks cute but had difficulty getting them to stand up.
Kelli at Holiday Crafts and Creations Says:
Very good question Tammy! That part of the project is a little hard to explain, but we have reworded it completely, so hopefully it is easier to understand now. It starts at Step 4. But please let us know if you have any more questions, we're happy to clarify :)
Tammy Says:
I am doing this project for my husbands co-workers. I am however having a real hard time with the Raffia. I just don't get how you have it? :*(
Anonymous Says:
Neat! Thanks so much!
Dominique Says:
adorable, love it! going to to make them.
Stephanie Says:
WOW- so cute! I love this idea! thank you!
Kaite Says:
This is REALLY cool! Instead of stamps on the bottoms i used the first letter of the persons names
khodges2716 Says:
Precious!!! I think I will do this with a third grade class but I may substitute hard candy for the m&m's to make it more cost effective or make them smaller. Thanks for the idea.
Thanksgiving crafts to make: Indian Corn Place Cards